Gravity bridge, Graviton, how to stake GRAV tokens, How to stake Gravity Bridge tokens, How to stake Graviton, where to stake GRAV tokens, where to stake Gravity Bridge tokens, where to stake Graviton, the best place to stake GRAV tokens, the best place to stake Gravity Bridge tokens, the best place to stake Graviton, How to stake GRAV using Keplr wallet, How to stake GRAV using Cosmostation wallet, How to stake GRAV in Keplr wallet, How to stake GRAV in Cosmostation wallet, step-by-step guide on how to stake Graviton, Gravity Bridge validator, Atlas Staking validator
| | |

How To Stake Gravity Bridge’s GRAV Tokens (2022)

Are you staking GRAV tokens yet? If not, you’re missing out on staking returns that are over 30%! Gravity Bridge is the best way to move tokens between Ethereum and Cosmos.

In this article we’ll lay out a step-by-step guide, everything you need to know to start staking Graviton tokens. This is one of the best ways to earn passive income. Plus, early supporters get the highest yield so here we go!

Staking Rewards

Graviton staking rewards have been 30% to 40%. Why do staking rewards fluctuate? Projects issue a fixed number of tokens. That’s referred to as the inflation rate. So, inflation is fixed. What’s not fixed is the number of tokens being staked.

Pro Tip

Early supporters who stake their tokens get the highest yield, because the new token supply is paid out to fewer wallet addresses as staking rewards. As more people stake their tokens, the new supply is divided up between more wallet addresses, so the staking rate falls.

Pro Tip #2

Bear markets are excellent opportunities for long term investors who stake their tokens. As people get scared out of their positions and unbond and sell, there are then fewer people left staking. So, those who stake enjoy a higher yield.

What is the difference between Graviton and Gravity Bridge?

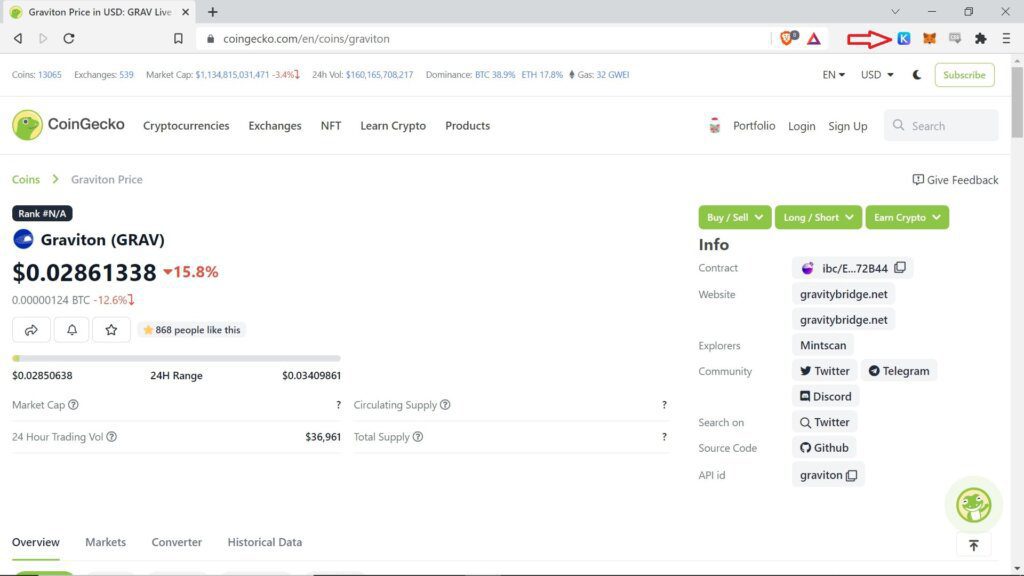
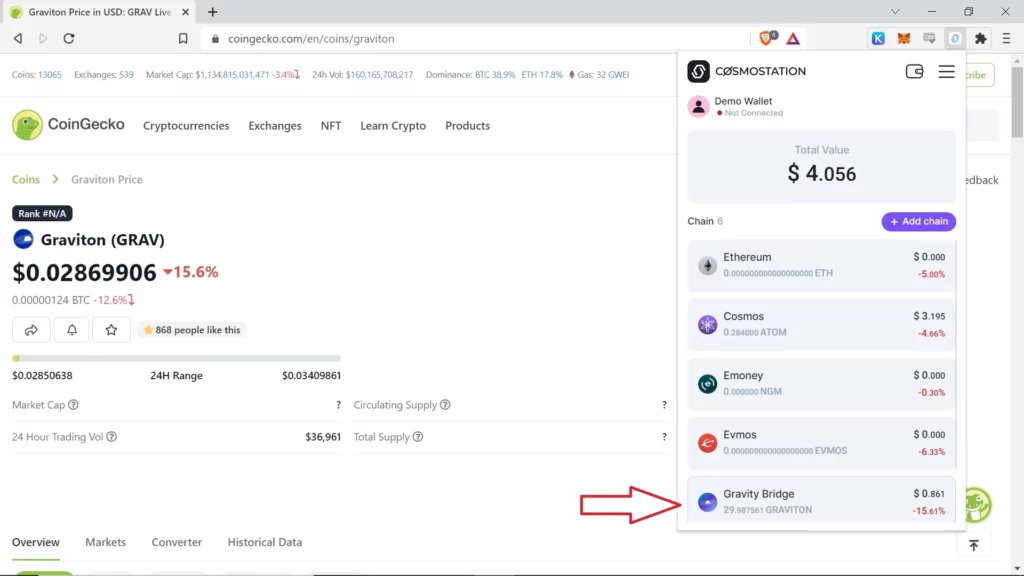
You’ll notice that Coingecko and Coinmarketcap list the GRAV token symbol as Graviton. Gravity Bridge is the project itself and the governance tokens are known as Graviton. The Graviton token symbol is GRAV.

Additionally, there are several projects that use GRAV as their token symbols, so make sure you’ve got the correct GRAV!

Purchasing GRAV

GRAV tokens aren’t currently available on any centralized exchange. They are however available on decentralized exchanges, like Osmosis and Crescent.

The GRAV tokens were initially airdropped to ATOM stakers. If you want to be notified when there are airdrops, our friends at Blocks United have a Cosmos airdrop email you may want to check out.

Keplr and Cosmostation Wallets

At this time GRAV tokens can be staked using Keplr and Cosmostation. Keplr is generally preferred by desktop user and Cosmostation is generally preferred by mobile users.

Ledger hardware wallet can be connected to both Keplr and Cosmostation for added security. At Atlas Staking, we always recommend using a hardware wallet.

So, let’s get down to business!

How To Stake Gravity Bridge GRAV Tokens Using Keplr Wallet

1. Download the Keplr browser extension. Give your wallet a name and set your password.
2. Click the Keplr icon on your browser toolbar to open the wallet. (See image below)

Gravity bridge, Graviton, how to stake GRAV tokens, How to stake Gravity Bridge tokens, How to stake Graviton, where to stake GRAV tokens, where to stake Gravity Bridge tokens, where to stake Graviton, the best place to stake GRAV tokens, the best place to stake Gravity Bridge tokens, the best place to stake Graviton, How to stake GRAV using Keplr wallet, How to stake GRAV using Cosmostation wallet, How to stake GRAV in Keplr wallet, How to stake GRAV in Cosmostation wallet, step-by-step guide on how to stake Graviton, Gravity Bridge validator, Atlas Staking validator

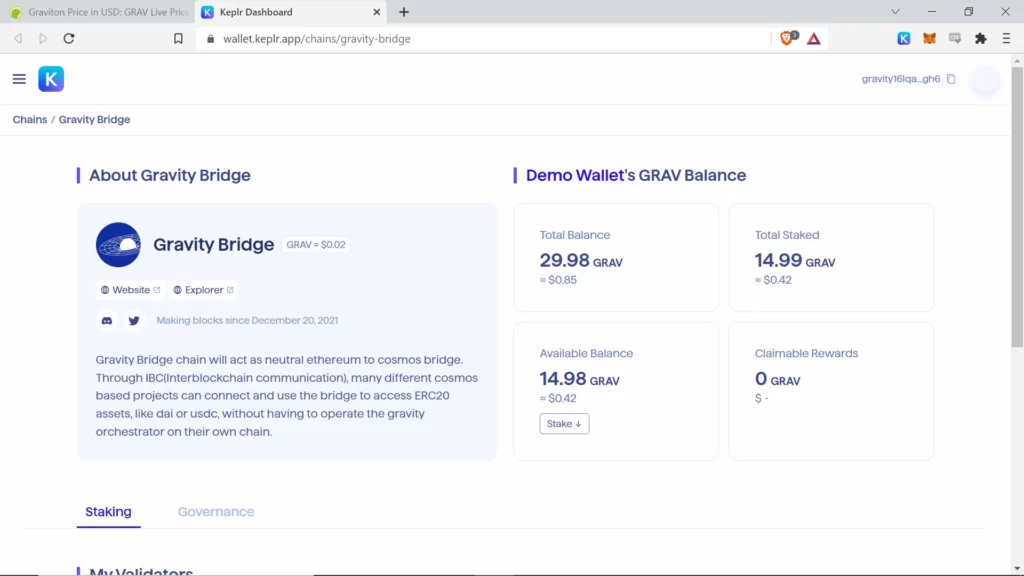
3. Click the dropdown arrow at the top of the wallet and select the “Gravity Bridge” network and then click the “Stake” button. (See image below)

Gravity bridge, Graviton, how to stake GRAV tokens, How to stake Gravity Bridge tokens, How to stake Graviton, where to stake GRAV tokens, where to stake Gravity Bridge tokens, where to stake Graviton, the best place to stake GRAV tokens, the best place to stake Gravity Bridge tokens, the best place to stake Graviton, How to stake using Keplr wallet, How to stake using Cosmostation wallet, How to stake in Keplr wallet, How to stake in Cosmostation wallet, step-by-step guide on how to stake Graviton, Gravity Bridge validator, Atlas Staking validator

4. The wallet will open up a new window in your browser. Click the “Stake” button or scroll down to find Atlas Staking in the list of validators. (See image below)

Gravity bridge, Graviton, how to stake GRAV tokens, How to stake Gravity Bridge tokens, How to stake Graviton, where to stake GRAV tokens, where to stake Gravity Bridge tokens, where to stake Graviton, the best place to stake GRAV tokens, the best place to stake Gravity Bridge tokens, the best place to stake Graviton, How to stake using Keplr wallet, How to stake using Cosmostation wallet, How to stake in Keplr wallet, How to stake in Cosmostation wallet, step-by-step guide on how to stake Graviton, Gravity Bridge validator, Atlas Staking validator

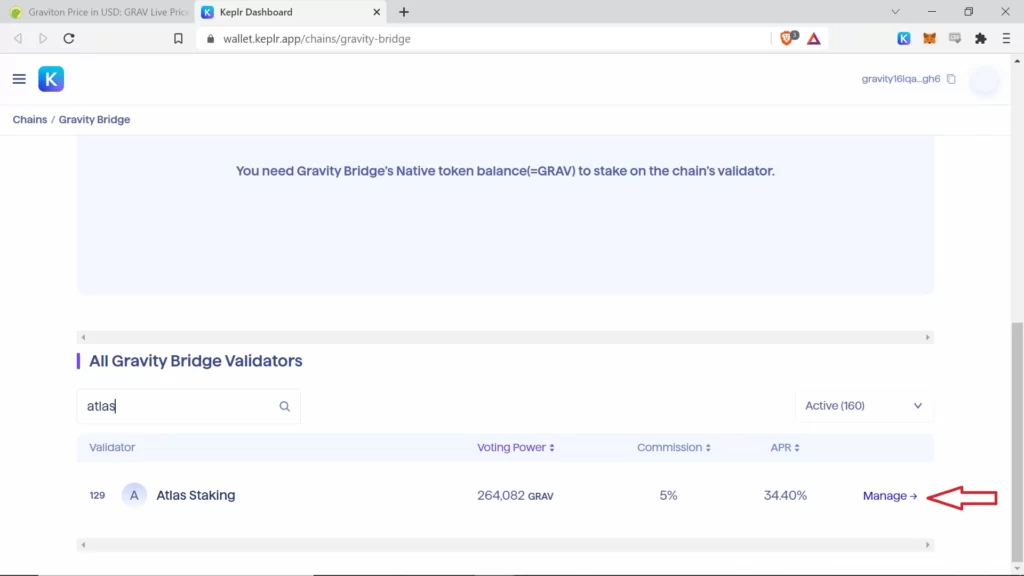
5. Type “Atlas Staking” in the search box or scroll down the list of validators to find us. (See image below)

Gravity bridge, Graviton, how to stake GRAV tokens, How to stake Gravity Bridge tokens, How to stake Graviton, where to stake GRAV tokens, where to stake Gravity Bridge tokens, where to stake Graviton, the best place to stake GRAV tokens, the best place to stake Gravity Bridge tokens, the best place to stake Graviton, How to stake using Keplr wallet, How to stake using Cosmostation wallet, How to stake in Keplr wallet, How to stake in Cosmostation wallet, step-by-step guide on how to stake Graviton, Gravity Bridge validator, Atlas Staking validator

6. Click “Manage ->”. (See image below)

Gravity bridge, Graviton, how to stake GRAV tokens, How to stake Gravity Bridge tokens, How to stake Graviton, where to stake GRAV tokens, where to stake Gravity Bridge tokens, where to stake Graviton, the best place to stake GRAV tokens, the best place to stake Gravity Bridge tokens, the best place to stake Graviton, How to stake using Keplr wallet, How to stake using Cosmostation wallet, How to stake in Keplr wallet, How to stake in Cosmostation wallet, step-by-step guide on how to stake Graviton, Gravity Bridge validator, Atlas Staking validator

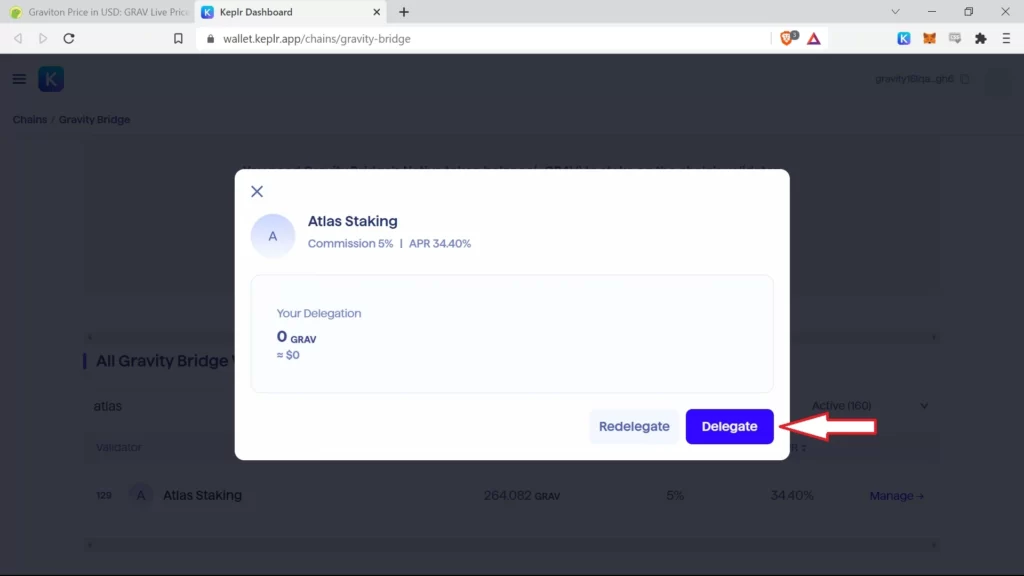
7. Click “Delegate”. (See image below)

Gravity bridge, Graviton, how to stake GRAV tokens, How to stake Gravity Bridge tokens, How to stake Graviton, where to stake GRAV tokens, where to stake Gravity Bridge tokens, where to stake Graviton, the best place to stake GRAV tokens, the best place to stake Gravity Bridge tokens, the best place to stake Graviton, How to stake using Keplr wallet, How to stake using Cosmostation wallet, How to stake in Keplr wallet, How to stake in Cosmostation wallet, step-by-step guide on how to stake Graviton, Gravity Bridge validator, Atlas Staking validator

8. Enter the number of tokens you’d like to delegate and then click, “Delegate”. (See image below).

ALWAYS leave spare change to pay for transaction fees. For example, if you have 12,438.976 GRAV tokens, only stake 12,438 and leave the 0.976 GRAV in your wallet to pay transaction fees.

Gravity bridge, Graviton, how to stake GRAV tokens, How to stake Gravity Bridge tokens, How to stake Graviton, where to stake GRAV tokens, where to stake Gravity Bridge tokens, where to stake Graviton, the best place to stake GRAV tokens, the best place to stake Gravity Bridge tokens, the best place to stake Graviton, How to stake using Keplr wallet, How to stake using Cosmostation wallet, How to stake in Keplr wallet, How to stake in Cosmostation wallet, step-by-step guide on how to stake Graviton, Gravity Bridge validator, Atlas Staking validator

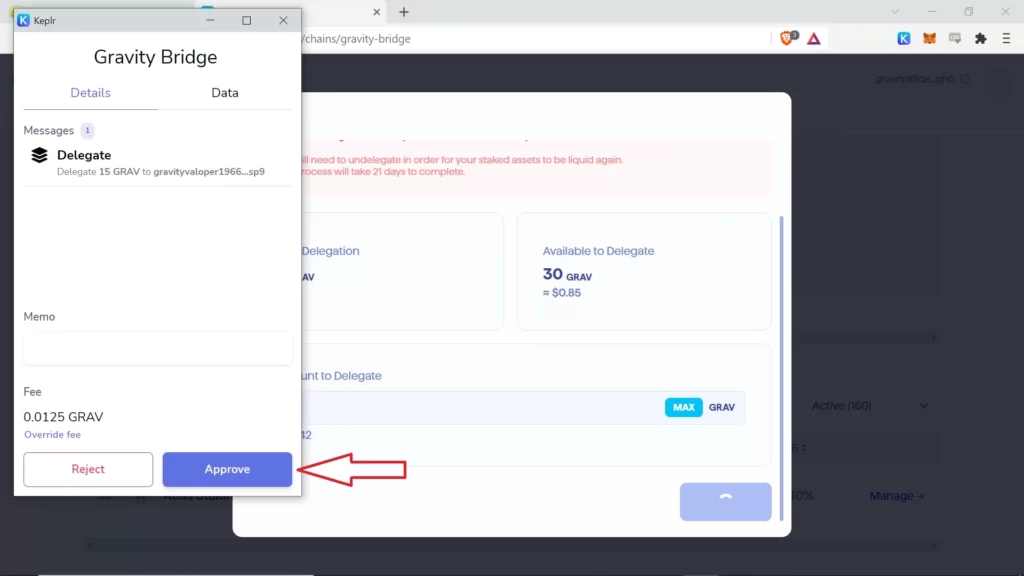
9. A pop up box will appear. Click “Approve”. (See image below)

Gravity bridge, Graviton, how to stake GRAV tokens, How to stake Gravity Bridge tokens, How to stake Graviton, where to stake GRAV tokens, where to stake Gravity Bridge tokens, where to stake Graviton, the best place to stake GRAV tokens, the best place to stake Gravity Bridge tokens, the best place to stake Graviton, How to stake using Keplr wallet, How to stake using Cosmostation wallet, How to stake in Keplr wallet, How to stake in Cosmostation wallet, step-by-step guide on how to stake Graviton, Gravity Bridge validator, Atlas Staking validator

10. You’ll see pop ups that show the transaction is processing and then has successfully completed. (See image below)

Gravity bridge, Graviton, how to stake GRAV tokens, How to stake Gravity Bridge tokens, How to stake Graviton, where to stake GRAV tokens, where to stake Gravity Bridge tokens, where to stake Graviton, the best place to stake GRAV tokens, the best place to stake Gravity Bridge tokens, the best place to stake Graviton, How to stake using Keplr wallet, How to stake using Cosmostation wallet, How to stake in Keplr wallet, How to stake in Cosmostation wallet, step-by-step guide on how to stake Graviton, Gravity Bridge validator, Atlas Staking validator

11. You’ll then see your staked position on the main wallet page. (See image below)

Gravity bridge, Graviton, how to stake GRAV tokens, How to stake Gravity Bridge tokens, How to stake Graviton, where to stake GRAV tokens, where to stake Gravity Bridge tokens, where to stake Graviton, the best place to stake GRAV tokens, the best place to stake Gravity Bridge tokens, the best place to stake Graviton, How to stake using Keplr wallet, How to stake using Cosmostation wallet, How to stake in Keplr wallet, How to stake in Cosmostation wallet, step-by-step guide on how to stake Graviton, Gravity Bridge validator, Atlas Staking validator

That’s it! Your GRAV tokens are now staked with Atlas Staking.

How To Stake Gravity Bridge GRAV Tokens Using Cosmostation Wallet

1. Download the Cosmostation browser extension, set a password and select the networks you’d like the wallet to access.

Be sure to select Gravity Bridge as one of the networks Cosmostation can access. Then click the Cosmostation icon on your browser toolbar to open the wallet. (See image below)

Gravity bridge, Graviton, how to stake GRAV tokens, How to stake Gravity Bridge tokens, How to stake Graviton, where to stake GRAV tokens, where to stake Gravity Bridge tokens, where to stake Graviton, the best place to stake GRAV tokens, the best place to stake Gravity Bridge tokens, the best place to stake Graviton, How to stake using Keplr wallet, How to stake using Cosmostation wallet, How to stake in Keplr wallet, How to stake in Cosmostation wallet, step-by-step guide on how to stake Graviton, Gravity Bridge validator, Atlas Staking validator

2. Click “Gravity Bridge” from the list of networks. (See image below)

Gravity bridge, Graviton, how to stake GRAV tokens, How to stake Gravity Bridge tokens, How to stake Graviton, where to stake GRAV tokens, where to stake Gravity Bridge tokens, where to stake Graviton, the best place to stake GRAV tokens, the best place to stake Gravity Bridge tokens, the best place to stake Graviton, How to stake using Keplr wallet, How to stake using Cosmostation wallet, How to stake in Keplr wallet, How to stake in Cosmostation wallet, step-by-step guide on how to stake Graviton, Gravity Bridge validator, Atlas Staking validator

3. The wallet will open up a new window in your browser. If it does not open a new window navigate to https://wallet.cosmostation.io/gravity-bridge. Click “Connect Wallet”. (See image below)

Gravity bridge, Graviton, how to stake GRAV tokens, How to stake Gravity Bridge tokens, How to stake Graviton, where to stake GRAV tokens, where to stake Gravity Bridge tokens, where to stake Graviton, the best place to stake GRAV tokens, the best place to stake Gravity Bridge tokens, the best place to stake Graviton, How to stake using Keplr wallet, How to stake using Cosmostation wallet, How to stake in Keplr wallet, How to stake in Cosmostation wallet, step-by-step guide on how to stake Graviton, Gravity Bridge validator, Atlas Staking validator

4. A pop up appears. Click “Cosmostation”. (See image below)

Gravity bridge, Graviton, how to stake GRAV tokens, How to stake Gravity Bridge tokens, How to stake Graviton, where to stake GRAV tokens, where to stake Gravity Bridge tokens, where to stake Graviton, the best place to stake GRAV tokens, the best place to stake Gravity Bridge tokens, the best place to stake Graviton, How to stake using Keplr wallet, How to stake using Cosmostation wallet, How to stake in Keplr wallet, How to stake in Cosmostation wallet, step-by-step guide on how to stake Graviton, Gravity Bridge validator, Atlas Staking validator

5. A pop up will appear requesting a connection to your wallet. Click “Confirm”. (See image below)

Gravity bridge, Graviton, how to stake GRAV tokens, How to stake Gravity Bridge tokens, How to stake Graviton, where to stake GRAV tokens, where to stake Gravity Bridge tokens, where to stake Graviton, the best place to stake GRAV tokens, the best place to stake Gravity Bridge tokens, the best place to stake Graviton, How to stake using Keplr wallet, How to stake using Cosmostation wallet, How to stake in Keplr wallet, How to stake in Cosmostation wallet, step-by-step guide on how to stake Graviton, Gravity Bridge validator, Atlas Staking validator

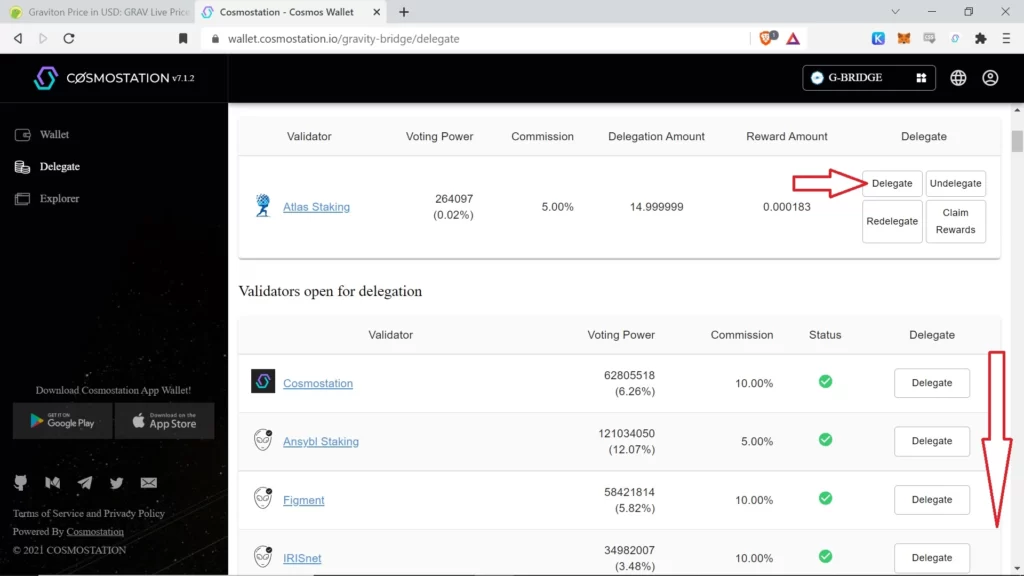
6. Click “Delegate” on the left toolbar. (See image below)

Gravity bridge, Graviton, how to stake GRAV tokens, How to stake Gravity Bridge tokens, How to stake Graviton, where to stake GRAV tokens, where to stake Gravity Bridge tokens, where to stake Graviton, the best place to stake GRAV tokens, the best place to stake Gravity Bridge tokens, the best place to stake Graviton, How to stake using Keplr wallet, How to stake using Cosmostation wallet, How to stake in Keplr wallet, How to stake in Cosmostation wallet, step-by-step guide on how to stake Graviton, Gravity Bridge validator, Atlas Staking validator

7. Scroll down the list of available validators to find Atlas Staking and click “Delegate”. (See image below)

Gravity bridge, Graviton, how to stake GRAV tokens, How to stake Gravity Bridge tokens, How to stake Graviton, where to stake GRAV tokens, where to stake Gravity Bridge tokens, where to stake Graviton, the best place to stake GRAV tokens, the best place to stake Gravity Bridge tokens, the best place to stake Graviton, How to stake using Keplr wallet, How to stake using Cosmostation wallet, How to stake in Keplr wallet, How to stake in Cosmostation wallet, step-by-step guide on how to stake Graviton, Gravity Bridge validator, Atlas Staking validator

8. Enter the number of tokens you’d like to stake and then click, “Generate & Sign Transaction”. NEVER stake 100% of your tokens. ALWAYS leave spare change to pay for transactions. (See image below)

Gravity bridge, Graviton, how to stake GRAV tokens, How to stake Gravity Bridge tokens, How to stake Graviton, where to stake GRAV tokens, where to stake Gravity Bridge tokens, where to stake Graviton, the best place to stake GRAV tokens, the best place to stake Gravity Bridge tokens, the best place to stake Graviton, How to stake using Keplr wallet, How to stake using Cosmostation wallet, How to stake in Keplr wallet, How to stake in Cosmostation wallet, step-by-step guide on how to stake Graviton, Gravity Bridge validator, Atlas Staking validator

9. A pop up will appear. Click “Confirm”. (See image below)

Gravity bridge, Graviton, how to stake GRAV tokens, How to stake Gravity Bridge tokens, How to stake Graviton, where to stake GRAV tokens, where to stake Gravity Bridge tokens, where to stake Graviton, the best place to stake GRAV tokens, the best place to stake Gravity Bridge tokens, the best place to stake Graviton, How to stake using Keplr wallet, How to stake using Cosmostation wallet, How to stake in Keplr wallet, How to stake in Cosmostation wallet, step-by-step guide on how to stake Graviton, Gravity Bridge validator, Atlas Staking validator

10. Another popup will appear to let you know the transaction was successful. Click “Confirm” to continue. (See image below)

Gravity bridge, Graviton, how to stake GRAV tokens, How to stake Gravity Bridge tokens, How to stake Graviton, where to stake GRAV tokens, where to stake Gravity Bridge tokens, where to stake Graviton, the best place to stake GRAV tokens, the best place to stake Gravity Bridge tokens, the best place to stake Graviton, How to stake using Keplr wallet, How to stake using Cosmostation wallet, How to stake in Keplr wallet, How to stake in Cosmostation wallet, step-by-step guide on how to stake Graviton, Gravity Bridge validator, Atlas Staking validator

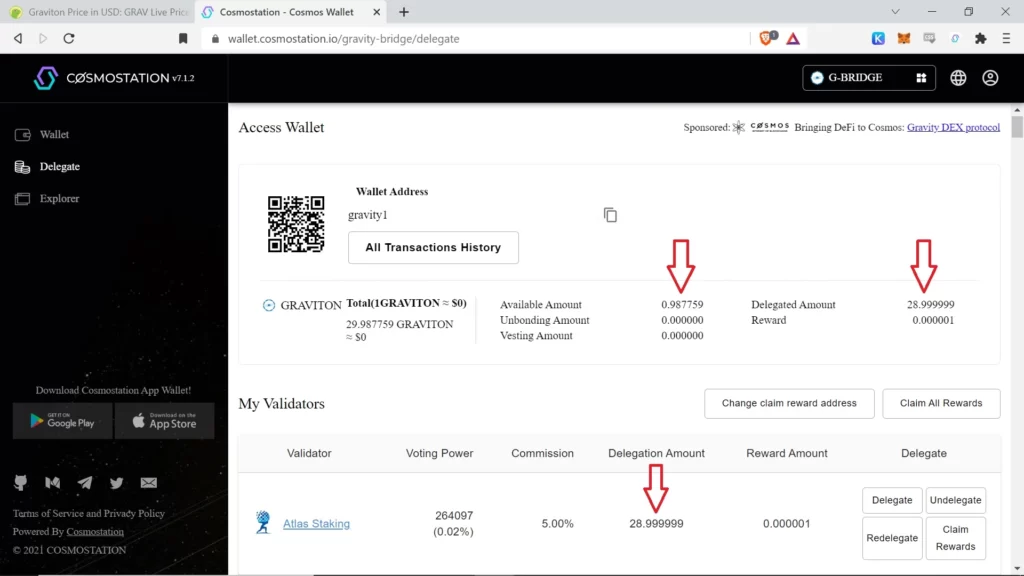
11. You’ll be taken back to your main wallet page to see your staked and available tokens. (See image below)

Gravity bridge, Graviton, how to stake GRAV tokens, How to stake Gravity Bridge tokens, How to stake Graviton, where to stake GRAV tokens, where to stake Gravity Bridge tokens, where to stake Graviton, the best place to stake GRAV tokens, the best place to stake Gravity Bridge tokens, the best place to stake Graviton, How to stake using Keplr wallet, How to stake using Cosmostation wallet, How to stake in Keplr wallet, How to stake in Cosmostation wallet, step-by-step guide on how to stake Graviton, Gravity Bridge validator, Atlas Staking validator

12. Click the person icon in the top right and then click “Close Wallet” to disconnect. (See image below)

Gravity bridge, Graviton, how to stake GRAV tokens, How to stake Gravity Bridge tokens, How to stake Graviton, where to stake GRAV tokens, where to stake Gravity Bridge tokens, where to stake Graviton, the best place to stake GRAV tokens, the best place to stake Gravity Bridge tokens, the best place to stake Graviton, How to stake using Keplr wallet, How to stake using Cosmostation wallet, How to stake in Keplr wallet, How to stake in Cosmostation wallet, step-by-step guide on how to stake Graviton, Gravity Bridge validator, Atlas Staking validator

That’s it! Your GRAV tokens are now staked with Atlas Staking.

Did you know that you can move your staked tokens from one validator to another without unbonding and waiting 21 days? It’s called “redelegating.”

Please know that you can only redelegate tokens once in 21 days. That’s to keep people from jumping around to chase the highest yield.

If you have GRAV tokens staked with a different validator and would like to move them to Atlas Staking, it’s simple!

How To Redelegate To A Different Validator Using Keplr

  1. Inside Keplr, click “Manage→” next to your current validator.
  2. A popup box appears. Click “Redelegate”.
  3. Type Atlas Staking in the “Search Validator” box, or scroll down the list to find us.
  4. Click “Atlas Staking” and then click “Next”.
  5. Enter the amount you’d like to redelegate from your current validator to Atlas Staking and then click, “Redelegate”
  6. A pop up box appears for you to confirm the transaction
  7. That’s it! You’ve redelegated tokens to our validator node.

How To Redelegate To A Different Validator Using Cosmostation

  1. Navigate to https://wallet.cosmostation.io/gravity-bridge and click “Connect”.
  2. Click “Delegate” on the left toolbar.
  3. Under “My Validators” simply click “Redelegate”.
  4. Scroll down the list of available validators to find Atlas Staking and click on Atlas Staking.
  5. A popup box will appear. Enter the number of tokens you’d like to redelegate to Atlas Staking and then click, “Generate & Sign Transaction”.
  6. A pop up will appear. Click “Confirm”.
  7. Another popup will appear to let you know the transaction was successful. Click “Confirm” to continue.
  8. You’ll be taken back to your main wallet page to see your staked and available tokens.

Conclusion

We hope this article has been a useful guide on how to stake Gravity Bridge tokens. Good luck in your journey to earn passive income! If you have any questions or comments, please fill out our contact form.

Similar Posts

One Comment

Leave a Reply

Your email address will not be published. Required fields are marked *